wood gluing techniques

5 Wood Gluing Techniques: How to Use Wood Glue Effectively for Your Projects

Does using wood glue for your projects intimidate you? Follow these wood gluing techniques to make gluing wood together easier.

Wood is a great material to work with as most wood species are easy to glue. Wood is porous and glue can grab onto it.

In fact in some strength tests, the glue held and it was the wood fibres that broke and caused the joint to fail.

However beginners usually find using wood glue to be stressful and difficult. Glue sets up quickly and if you are not prepared, will dry before you have a chance to put the two pieces of wood together.

Clamping also seems to be a worry – do I have enough clamps? 

And having glue squeezing out everywhere is messy and can make you lose it as you try and clean up before the glue dries.

Let’s look at five wood gluing tips, so that you can actually enjoy gluing wood together.

Best Glue for Wood

wood gluing techniques

There are many glues on the market. And then there is a subset of all the glues especially for woodworkers. So many that it’s hard to know what glue to use.

For the beginner I suggest keeping it simple.

Wood glue is readily available, easy to work with and cleans up with water while wet. There are different formulations depending on where the glue is used and how much working time you need. 

Titebond III is the most popular with most woodworkers and is food safe, important if you are gluing up wood for a bowl turning or a cutting board. Or if building toys and furniture for your kids. It also has a longer working-time glue so that you don’t have to rush gluing wood together.

The other recommendation is to also have a bottle of gel-type cyanoacrylate adhesive (CA) glue (more commonly known as super glue or crazy glue) on hand. This comes in handy for trickier glue joints which you might not be able to clamp easily. You can add a few dabs of CA between the wood glue to have it temporarily grab until the wood glue has a chance to set.
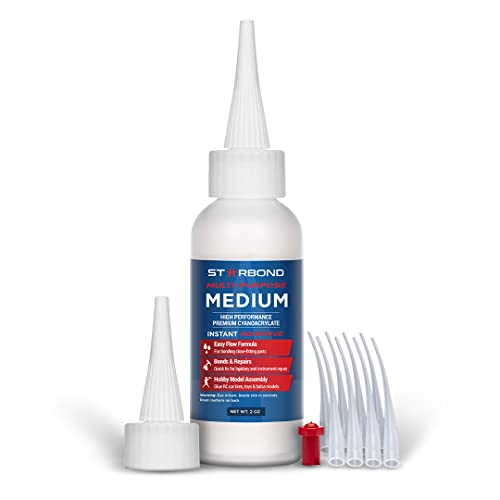
Having a CA accelerator is also handy, where you put CA glue on one piece, spray the accelerator on the other piece and then join them together for an instant bond.

A good idea if you start using it a lot is a kit with the three viscosities of CA glue and the accelerator. Just keep in mind the shelf life of CA glue can be short if you don’t ensure the bottles are firmly closed each time you use them.

Use enough glue

spreading out glue on wood

The mistake most beginners make is not using enough glue and not distributing it evenly. Then what you end up with is what is called a starved joint. 

With not enough glue, you have voids and places where the wood simply doesn’t bond together. 

You basically want a thick enough coat of glue so that when you apply clamping pressure, you get a bead of glue squeezing out consistently along the length of the glue-up.

The best way to find out how much is too much or too little is to experiment. Grab two pieces of scrap wood, apply glue to both surfaces and clamp it up. Check to see what kind of glue bead you get. 

Too much glue will mean that you get huge drips of glue. 

Too little means you won’t see that consistent bead.

Apply glue also requires using the right tools. In a pinch you can use your finger to spread the glue, but I wouldn’t recommend getting used to doing that. When you move to other glues you might be tempted to do the same but with stickier results.

The cheapest and most readily available tool is still an old toothbrush! With it you can easily spread the glue.

Other alternatives if you want to spend some money are rollers and special silicone glue brushes that you can easily clean dried glue from.

Special bottles with different attachments make certain glues easier but keep in mind that these need to be cleaned each time you use them.

Use enough clamps

wood clamps

Clamps are the woodworker’s best friend. The saying goes that you can never have enough clamps.

Clamps apply pressure to a glue joint so that the entire joint pulls together and the glue can bond to both pieces of wood.

Clamps generally can’t fix a badly prepared joint. So you do need to make sure that the wood is straight and the joint closes tightly by itself without clamps.

There are so many types of clamps. For the beginner I would recommend using quick adjustable clamps. They come in various lengths.